This article references out of date software that doesn't work anymore. Click here to go to the new updated article and video.
The Raspberry Pi makes for one awesome retro gaming machine. From Commodore64, to NES, to Playstation. While some of these consoles work better than others, and sometimes different games can be difficult, we can play modern AAA titles with our Raspberry Pi. Who wouldn’t want to play GTA V on a Raspberry Pi in the living room instead of on a chair at the desk?
That’s what we’re going to do today.
Install RetroPie
Head on over to the RetroPie Downloads Page and pick the appropriate image. If you grab the wrong image this won’t work. If you have a Raspberry Pi Zero, Zero W or 1st Generation, click the Raspberry Pi 0/1 link and if you have a Raspberry Pi 2, 3 Model B, or 3 Model B +, grab the Raspberry Pi 2/3 image.
Once this finishes downloading, unzip the archive with your favorite application (7-Zip, Winrar, Archive, etc…) and now write your image to the SD Card. Since I’m using Ubuntu I’ll go with Etcher, but you can use Etcher on Windows, Mac or Linux. Alternatively, Windows users can use Win32DiskImager.
Add Some Power
Plug your SD Card in the Pi and add power. Your Pi will go through its initial configuration. Once you’ve booted you’ll be greeted with the Emulation Station front end, and at this point we don’t have any emulators installed so we we will only see the RetroPie option. Connect to WiFi unless you’re plugged in (#teamEthernet).
Under the RetroPie menu, select Raspi-Config and select Advanced Options. We want to set a decent amount of memory for our GPU so let’s select Memory Split and enter 320. Select finish and reboot your Pi. We’re not quite done with the setup so select RetroPie and then select RetroPie Setup. Update the RetroPie Setup Script and then perform the Basic Install. This will take a while (~30 minutes…ish)
Install Parsec on Windows Desktop
Simply head over to the Parsec website and download the latest client. You will need to create an account, but that’s free. So…do it?
Install Parsec On Pi
Parsec is great, it allows us to stream games from our more powerful desktop computers, or a rented gaming rig in the cloud. I find for best results you’ll want to be wired in on both your desktop and your Pi to reduce latency and really improve gameplay. If we were installing Parsec on Raspbian we would follow the steps on the Parsec website, but since we’re installing it on RetroPie we need to follow the instructions laid out by GitHub user
sudo apt install git
git clone https://github.com/Kozova1/Parsec-Integration-With-RetroPie.git
cd Parsec-Integration-With-RetroPie
sudo chmod +x setup.sh && sudo ./setup.sh -nodrv
#1 installs Git. Git is good. Get git.
#2 clones the files we need to make this work.
#3 brings us into the folder that the previous command created
#4 marks the install script as executable and then tells is to run.
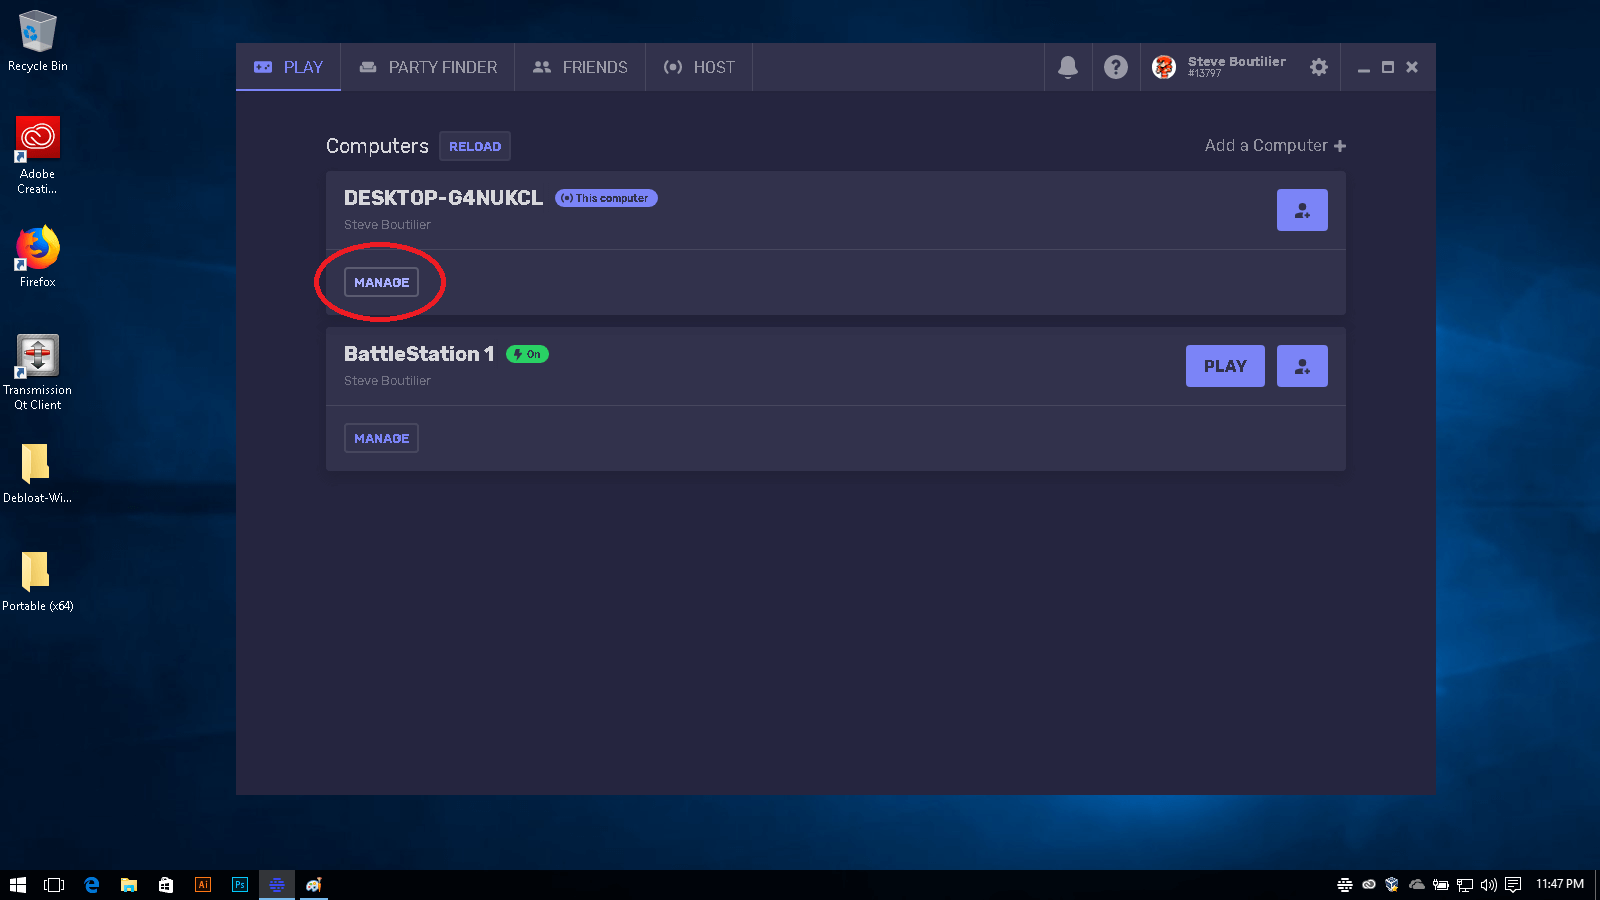
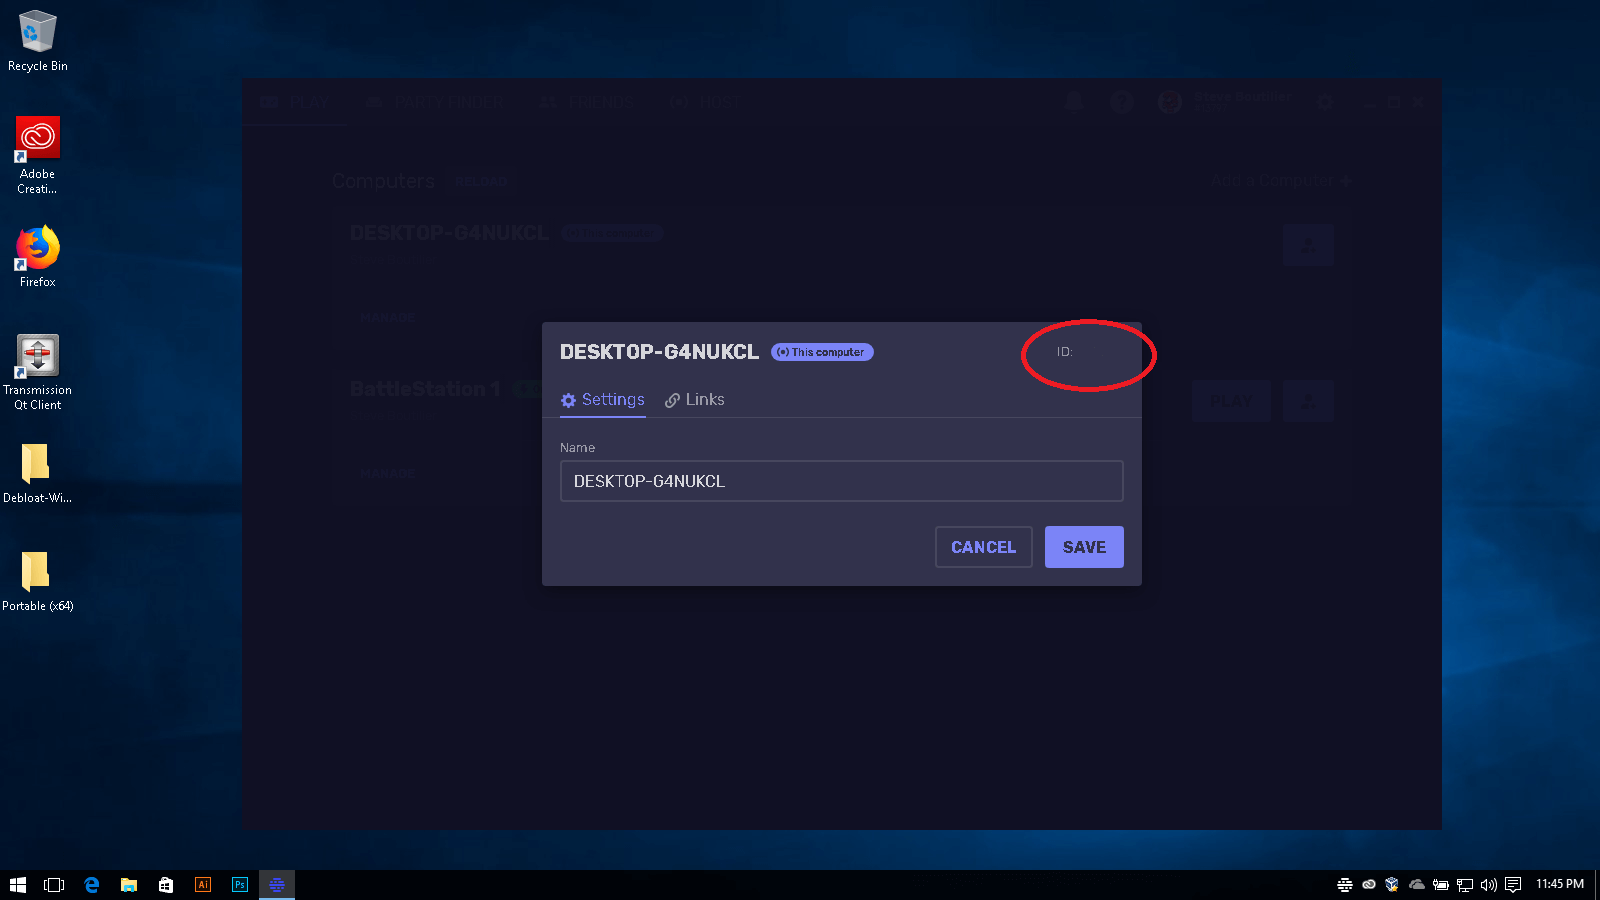
You will be asked for your server ID, this is found in a couple of places. I like to find it in the Console which you can find by right clicking on your Parsec System Tray Icon and clicking on Show Console. Although the new way of finding your Server ID is by opening the Parsec client on your desktop, choosing Manage under your desktop, like this:

Your Server Id will be available in the top right corner of this window.

After this reboot your pi.
to run Parsec on your Pi, run the command
parsec
It will ask you for your username and password, these are your Parsec Account details. you can create a free account on their website. After you log in, you will be asked which server you want to connect to and BOOM you’re golden!

![You are currently viewing [OLD] Play modern games on your Pi. Getting started with RetroPie and Parsec.](https://howtobreakit.com/wp-content/uploads/2018/08/parsecCoverV2.jpg)
